Build a Boss Getting Started Guide
Your first hour in [ENDLESS] Build a Boss—from empty boss to a clearable early-zone layout.
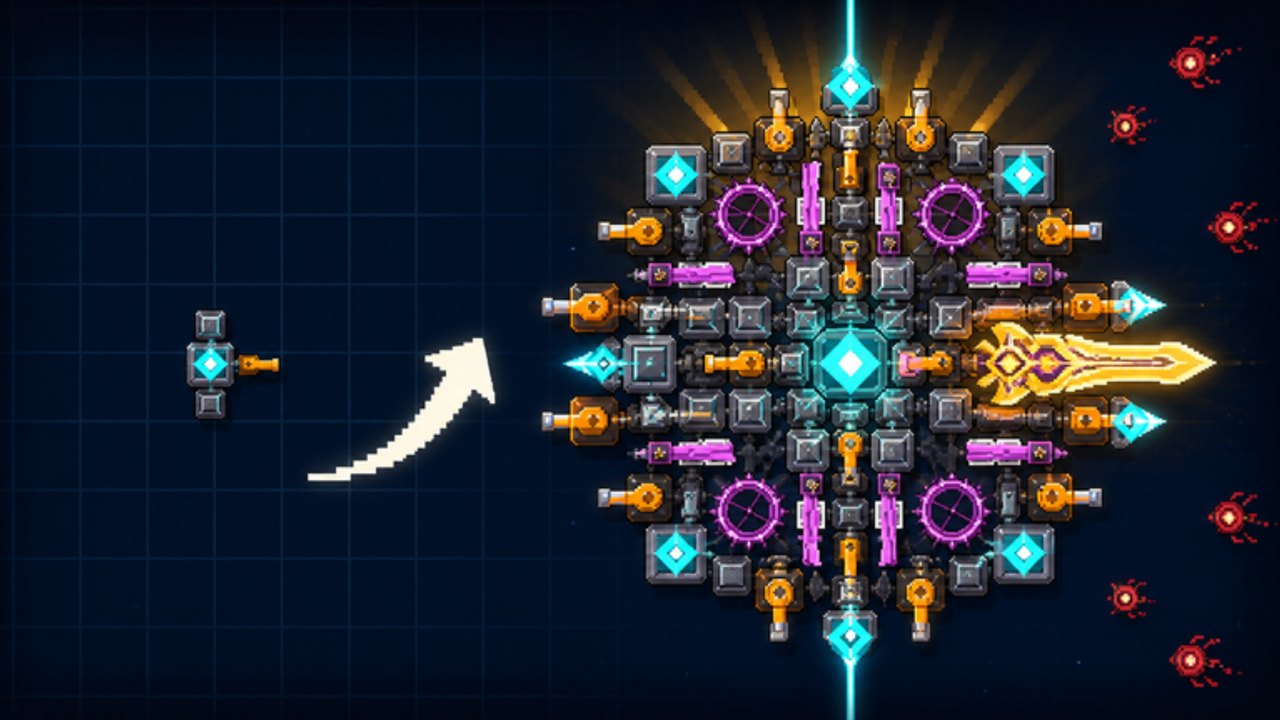
Welcome to [ENDLESS] Build a Boss, the Ro2D pixel boss-builder from taapr studios. This getting-started guide covers joining the experience, understanding the cash-and-gems loop, buying your first guns / lasers / armor parts, surviving early levels, and knowing which wiki page to open when you hit a wall. The game released on 22 August 2026 on Roblox (place ID 121716260544429). Servers support up to 10 players. There are no promo codes yet—progress is earned in fights.
If you prefer watching a session first, the embedded video above shows live play. Then come back here for a structured checklist.
Step 1 — Launch and settle in
- Open the Roblox page for Build a Boss and press Play.
- Wait for the Ro2D client to load. You will land in a lobby / build space shared with up to nine other players.
- Favorite the experience and enable notifications so you catch taapr studios updates (new zones, shop tweaks, or future codes).
- Optionally join the taapr studios community for announcements—see the Players Hub for etiquette.
Glance at Controls if movement or UI buttons feel unclear on your device. Mobile and desktop both work; desktop usually makes precise part placement easier.
Step 2 — Learn the core loop in five minutes
Official pitch, boiled down:
- Build a boss from guns, lasers, and armor parts.
- Fight enemies that try to destroy you across 75 levels in 10 zones.
- Win cash and gems, then upgrade or rebuild.
- Chase up to 3 stars on every level.
Your first session should prove that loop, not chase perfection. Clear a few early levels with a crude boss, earn cash, buy one better part, and feel the power spike. That feedback teaches more than any theory craft.
Step 3 — Buy your first parts (role thinking)
The shop sells many individual pieces, but mentally sort every offer into three roles:
| Role category | Job | Early-game habit |
|---|---|---|
| Starter Gun | Reliable damage | Buy one affordable gun role first so fights end |
| Burst / Beam Laser | Pierce or line pressure | Add when packs stack or armor-only fails |
| Plate Armor | Survive hits | Enough shell to finish the level, not a full fortress |
Do not empty your wallet on three armor plates and zero damage. A tank that cannot kill will stall forever and starve your economy. Likewise, a pure glass cannon dies before payout. Aim for a humble hybrid: one damage source, a little armor, optional laser if cash allows.
For deeper shop evaluation, open Parts Tier after your first rebuild. For full assembly habits, use How to Build a Boss.
Step 4 — Assemble a boss that can move and shoot
Placement rules that save beginners:
- Put armor where incoming fire concentrates (front / exposed faces).
- Keep guns with clear firing lanes—do not bury barrels behind your own plates.
- Place lasers so their beam path crosses choke points or dense spawn lanes.
- Leave yourself a mental “core”: if the boss has a weak central piece, protect it early.
Expect to scrap and rebuild. Rebuilds are normal, not failure. Early cash is for experimentation. Mid-game is when you lock an archetype from Best Builds.
Before a serious attempt, run the Build Checklist.
Step 5 — Fight the first levels and read the result
Enter an early level. Watch:
- How fast your HP drops
- Whether enemies die before they overwhelm you
- Whether you finish with time / health left for stars
After the fight:
- Easy clear, low stars: you may be under-killing or missing a star condition—see How to Get 3 Stars.
- Close loss: add a Plate Armor role or reposition guns.
- Comfortable win with spare cash: bank a little, then buy the next damage upgrade rather than cosmetic clutter.
Cash funds most shop buys. Gems are the scarcer currency—treat them as mid/late investments, not day-one impulse spends. Farming routes live on Cash & Gems Farming.
Step 6 — Understand zones without rushing endgame
There are 10 zones totaling 75 levels. Early zones teach patterns. Mid zones punish unbalanced builds. Late zones expect intentional archetypes and star farming for gem income. Do not skip straight to zone 8 with a starter kit. Use Zones & Levels Walkthrough for pacing: when to farm, when to push, when to rebuild.
A healthy first-session goal:
- Clear several early levels.
- Earn enough cash for a second damage part and a second armor piece.
- Attempt one star improvement on a level you already beat.
- Bookmark this wiki’s Guides Hub and Tier List Hub.
Step 7 — Social layer (optional but useful)
With max 10 players, lobbies feel small. Do not grief builds, spam chat, or block shop access if the UI is shared space. Share tips without spoiling every star trick if someone asks for hints only. Group and community tips sit on the Players Hub.
Common beginner mistakes
- All armor, no guns — you live forever and earn nothing.
- All guns, no armor — you melt on the first spike wave.
- Ignoring lasers — some packs punish pure ballistic patterns; pierce roles exist for a reason.
- Hoarding cash forever — unused cash does not clear levels; buy deliberate upgrades.
- Spending gems on day-one vanity — save gems for meaningful shop breakpoints.
- Never rebuilding — bolted-on random parts create dead weight; scrap and redesign.
- Chasing endgame tier lists too early — evaluate parts for your zone band, not patch-day late meta.
- Skipping stars entirely — three-star clears often improve long-term gem flow; learn the system early via Three Stars.
What to read next
| If you feel… | Open |
|---|---|
| Lost in UI / inputs | Controls |
| Confused about placement | How to Build a Boss |
| Broke on cash or gems | Cash & Gems Farming |
| Stuck under 3 stars | How to Get 3 Stars |
| Lost on which zone to farm | Zones & Levels |
| Overwhelmed by shop roles | Parts Tier |
| Ready to pick an archetype | Best Builds |
First-hour checklist (copy this)
- Joined the place and favorited it
- Bought at least one Starter Gun role part
- Bought enough Plate Armor to survive an early clear
- Considered one laser role if packs stacked
- Cleared multiple early levels for cash
- Rebuilt once after learning what failed
- Attempted a better star rating on a known level
- Skimmed Guides Hub and Build Checklist
You do not need a perfect boss on day one. You need a repeatable loop: fight → earn → buy with intent → rebuild → push. Once that feels natural, the rest of the wiki—tiers, farming routes, zone walkthroughs—starts paying off.
Frequently Asked Questions
Quick answers for Build a Boss players.
Is Build a Boss free to play?
Yes. It is free on Roblox. Optional Robux purchases may exist in the store, but the core loop runs on cash and gems earned in fights.
Are there working codes right now?
No promo codes are available at launch. Watch the Codes Hub and taapr studios channels for future drops.
What should I buy first?
A Starter Gun role for damage, then enough Plate Armor to survive. Add a laser role when packs stack or clears stall.
How many levels and zones are there?
75 levels across 10 zones. Pace yourself—early zones teach the shop and fight loop before late difficulty spikes.
Where can I see someone play?
Use the YouTube embed on this page (PLAYING [ENDLESS] build a boss on Roblox), then return to the checklist above.